How Can We Help?
System Settings
Below the welcome section, you can find a small icon in the form of a gear, which is used for system settings, and we will explain this section.
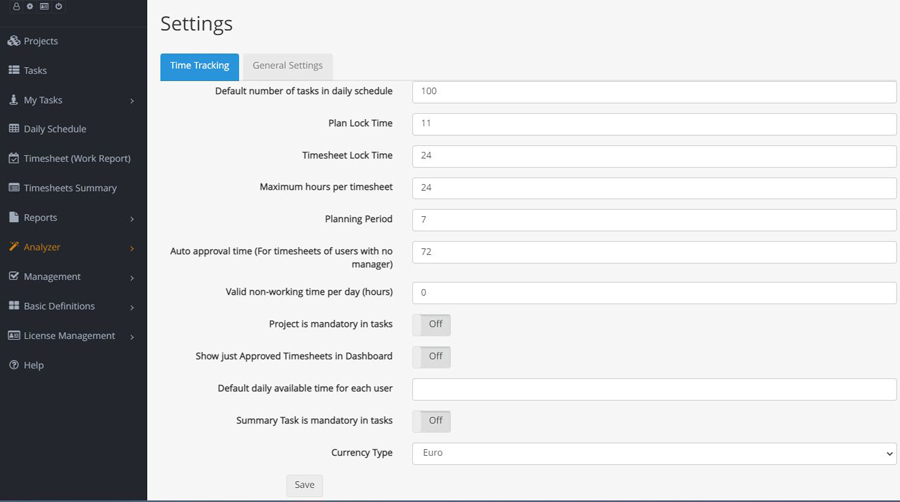
Time Tracking
Default number of tasks in the daily schedule
The default value, which is shown on a daily schedule, is 100, but it is possible to increase it.
Plan lock time
This item is used to determine a deadline by which the scheduling should be completed for the day, and the default value of it is 11 a.m.
Timesheet lock time
This item is used to determine a deadline by which timesheet recording is allowed, and its default value is 24 hours or a day.
Maximum hours per timesheet
In this section, you can limit the working hours to a certain amount of time. Its default value is 24.
Planning Period
In this section, you can determine how many days the users can plan for.
Auto approval time (For timesheets of users with no manager)
Setting up the ‘ Auto Approve time ‘ allows you to automate the Timesheet approval process. The system will automatically approve the timesheets of users (with no manager) after 72 hours. It is possible to change it.
Valid non-working time per day (hours)
It shows how many non-working hours are allowed during a day.
Project is mandatory in tasks
Enabling this option will make the project selection field mandatory in the task definition.
Show just Approved Timesheets in Dashboard
By enabling this option, only approved timesheets will be displayed in the dashboard.
Default daily available time for each user
For the workload chart, you should determine the Daily Available Time in the Manage Users section; Otherwise, the system will consider this number. Its default value is 7.33 hours.
Summary Task is mandatory in tasks
Enabling this option will make the summary task selection field mandatory in the task definition.
Currency Type
You can choose between Euro or USD.
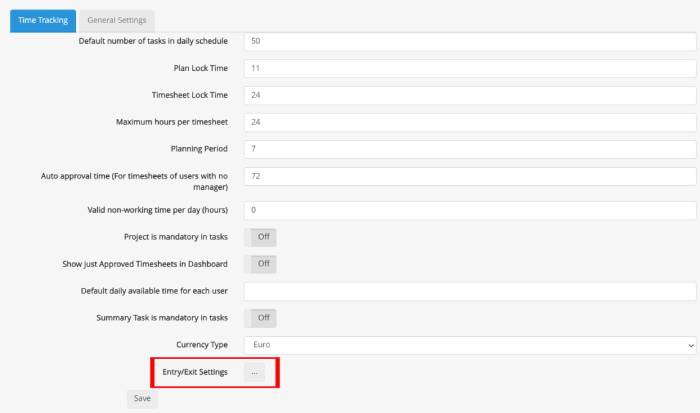
Entry/Exit Settings
For your users to be able to log Entry/Exit, you must first go to the settings and click on the Entry/Exit Settings.
No Limitation
If you enable the No Limitation, your users can easily log in and out from any location and IP. It is enough to refer to the log entry/exit section from the TaskBrowse menu.
IP Address
For those users who use the web version and want to log Entry/Exit, you can specify the required number of IPs so that the system only lets them log in from these IPs.
Enter the geographic location of the company or the place from where people can register in this field, then enter your acceptable radius. This possibility is for users who use the TaskBrowse Android application.
To specify the geographic location click on + if you have the latitude and longitude of the desired location, enter it manually, or click on the 3 points icon to find the desired location on the map. You can type a title for them.

General settings
Keep session alive
The length of the inactivity period that results in an automatic logout is defined as 30 minutes. However, you can select the “keep session alive” option.
First day of the week
As a system administrator, in the settings section, you can specify the first working day of the week so that the calendar changes according to your choice in all parts of the system.